|
This is the
documentation for The Magic Seal Editor. This file contains important
information that will help make the editor easier to use, and make you
more productive. Refer to this file, whenever you are having
difficulties using the editor.
Starting the
editor
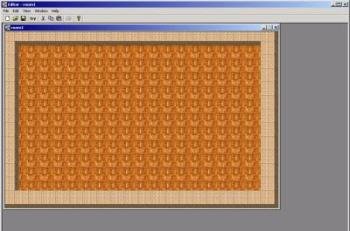
Click on "Build a Room" in the start Menu, the editor will open
When the editor starts, it opens a new empty room for you to start. The
interface is really simple.
Here is a
quick overview of the important options..
File
New: Creates a new empty room (you can work on more than
one room at the same time)
Save: Saves the current room to a file
Load: Loads a room from file and opens in the editor
The File menu also has the last 4 rooms you opened. This comes in handy
if you want to reopen a room you are currently working on...
Edit
Copy: Copies the currently selected cell into the editor
memory
Cut: Cuts the currently selected cell into the editor
memory
Paste: Puts the cell in the editor memory into the
currently selected cell
Undo: Undo the last operation you did. Useful if you just
made a mistake!
These are the usual operations you find in all windows programs... If
you know how to use Windows, you will find the editor really easy.
Now comes the 2 most important operations when you are using the
editor...
1. The Try button in the toolbar is used to try the room
you have done in the game. To try a room you do the following
a.
Left click on the spot where you want the prince to start the room in.
b. Click try. Notice that the locations of the current cell are
copied into the edit boxes. Click Ok to try the room
This is
important. You don't PUT the prince in the room, just like you put
everything else. This is logical, because this room can be in the middle
of a huge castle. It is pointless to PUT a prince in the room. Instead,
you try putting him in different places. you click on the spot where you
want the prince to start, and click try.
To actually determine the place where the prince will start in the whole
castle is a step that we will cover later, when we build a whole castle.
Note: the
Try feature is disabled in the shareware version
2.
Right clicking!
This is the single most important feature you are going to use when
dealing with the editor. Right clicking on the map is equivalent to
pasting. So, after copying a cell, you right click and hold the right
mouse button down, and move around. This is like using a brush to draw
on the room. Be sure to try this feature now, because it is the most
important feature in the editor, and it makes life really so much
easier.
The Cell Properties Dialog
Having had a
look at the editor itself, we now turn our attention into the cell
definition dialog. This is the dialog in which you define how the cell
looks like. At first sight, it looks complex. But this is just an
illusion, here we explain how it goes step by step...

As you can
see, the cell definition dialog is decomposed into 4 independent parts.
Each part sets a certain property for this cell... The 4 parts are the
color, the surface, the door, and the objects
in the cell. Don't panic, it is much easier than it looks like...
1.
Color:
This is the easiest thing. Here you choose the color of the cell. This
has no effect on the puzzles themselves. Simply choose the ground you
want from the 14 available ones. Your current selection will be shown in
the small box to the right.
2.
Surface: This is where you choose the type of the surface. Does it
have a conveyor belt? a sliding gate? a switch? and so on... Simply,
click on the surface you want, depending on the surface, more options
may become active...
a.
If it is a switch: The "Select from the map" button becomes
active. Click it to choose the
target
of the switch. When you click it, you return to the map, click once on
the target for the button.
b. Again, if it is a switch, the state becomes "Open
Target", or "Close Target". Choose the behavior you want for the
switch.
c. If it is a sliding gate, you get the options of
making it open or close. Choose the state you prefer.
d. If it is a blue conveyor belt, or an orange conveyor belt,
you choose the ID of the conveyor belt. What this means is that blue
conveyor belts of ID 0 control all the orange belts of ID 0. Blue
conveyor belts of ID 1 control all the orange CBs of ID 1, and so
on... You have 5 different IDs to work with (i.e. you can create 5
groups of independent blue CBs/Orange CBs pairs. Don't worry if this
is not very clear right now, it will become clearer after you start
using the editor).
3.
Door:
This is easy. Select the color of the door you want. Remember that the
colored doors, open using a gem of the same color, whilst silver doors
open using a switch. So, if this is a colored door, remember to put a
gem of the same color somewhere, or if it is a silver one, remember to
put the switch to open it. (or close it). You can also choose whether
the door is open of close.
4.
Object:
The last property you have to set, is the object in this cell. If the
cell does not have a hole, this becomes simple, just click on the object
you want to appear in the cell. Some properties will appear on the right
side, set them for this object. The three options, are Direction, State
and Frame
a.
Direction: Some objects have a direction. Like monsters,
and laser turrets. Set a direction for them using this combo box. Some
objects don't have a direction (like boxes). This combo box will be
disabled in this case.
b. State: Some objects also have a state. Like
laser turrets. They can be on or off. Or Elevators, they can be Going
Up, or Down, or not working. Choose the state for the object you
choose
c. Frame: Ignore these for now. They are not
essential. Once you really grasp how the editor works, have a look at
the advanced section below for a description of this one.
If you want
to add a hole, click on the "Cell has a hole" radio button.
Notice that a list box, and an edit box will appear. Enter the depth of
the hole you want, and click
generate.
In most cases this is enough. If you are interested in adding contents
to the hole (like a hole with a spike in it), click on the appropriate
position in the list box at the far left, then click on the object you
want to add. This may become clearer after using the editor for a while.
Summing Up
So, to sum
up all what we have learned, here is a quick summary..
To build a room, the steps are...
1.
Start a new empty room...
2. Double click on a cell, and use the cell definition dialog,
to define the shape of the cell.
3. Copy it (using Ctrl+C, or from the menu)
4. Press and hold the right mouse button, to draw this cell, in
all the places you want. (Using the mouse as a brush).
5. Double click on another cell to define it, and so on...
6. Click once on the square you want the prince to start at,
and click try in the toolbar.
If any of
the steps above are not very clear, try to use the editor for a while,
and then read the above again. It is easier than it looks!!
Advanced Topics
The reader
is recommended to go ahead and try the editor now. The topics below are
advanced, and it is recommended that you skip them on first reading.
Return to this part only when you are really good at using the editor,
and you want to know how to do any of the following techniques...
1. Sliding
Gates
These are the gates that automatically open and close at
specified intervals. You will find them under the "surfaces" part
in the cell dialog. There are two types of them. One type is the manual
type. This is triggered by a switch. There is nothing tricky about
those.
The trick comes to the automatic type. They open and close automatically
at specified intervals, but how do you specify the interval. It is easy.
You put the interval in the SurfaceY
edit box (the one to the right) below the surface images directly. A
value of 50 means approximately one second. It is best to experiment
with different values, and see which one works best with the room you
are developing.
2. Frames
What does
the frame field do for the objects? This field is at the bottom right of
the cell dialog. The purpose of this field is just aesthetic. Remember
in the game where there were many apples next to each other? They didn't
all float at the same time. They danced together in some sort of a wave!
(try the sample file "Never Released.room",
watch the row of apples to see this in action). To create the same
effect, give each apple a different frame value. For example the first
is 0, the next is 5, the next is 10, and so on... This will create the
effect you saw in the game. If all of them are set to 0. They will all
move up and down together, which is not as beautiful!
3. blue
square
You may have
come across the hollow blue square in the object images (Image number 40
in the list, just after the elevator). This is some sort of invisible
wall. It is not drawn in the game, but it just blocks the way. Remember
the dark room in the shareware version? it was created using this
invisible wall
4.
elevator
Adding an
elevator to your room is a little tricky. There are certain rules you
have to follow for the elevator to work...
the rules are...
1. The
elevator must be in a cell which has a depth of 4. If you put
an elevator in a cell whose depth is not 4, it will not work (the
prince will just walk over it and nothing will happen).
2. The elevator has to be in the first hole position (click Hole:1 and
choose the elevator)
3. The 3 spaces below the elevator have to be filled by that invisible
wall we just described above (see number 3 above). In each of the 3
slots, put the invisible wall (index number 40), for the elevator to
work
If you want
to see this in action, check sample room "Shareware - row 4 column
1.room" (double click on the elevator cell to see how it works).
Specifying
the destination of the elevator is another story! This step takes place,
when we are joining the rooms together. It will be discussed when we
talk about the joiner later... |

